Sunday, June 15, 2008

Inside the V-Synth, Part 4

In this installment, we'll look at one of the V-Synth's most outstanding assets -- its performance controls.


Starting With The Basics

The V-Synth's keyboard and bend lever are pretty typical for most Roland models since the late '80s. The five-octave keyboard, C to C, is one of the better synth-weighted keyboards. The keys are full size, have enough travel but not too much, and the stop blocks are just well enough damped. The keyboard is pressure (channel aftertouch) sensitive, and while this tends to be on the heavy side, it doesn't appear to suffer from the pressure sensor degredation of earlier Roland models. Of course, velocity and release velocity are sensed, although I haven't found anything that the V does with release velocity. (The system mode provides sensitivity adjustments for both velocity and aftertouch.) The key edges are blunted just enough to prevent glissandos from being painful, although the black keys do stand a bit high for the purpose. The white key ends have lips of about 1/8-inch, which do not overhang the lower front edge of the case (unlike some earlier Roland models).

The V has Roland's characteristic T-handle combined pitch bend and modulation control. Rocking it left or right affects pitch bend. (The amount of bend is a patch parameter; up and down can be set to different ranges.) It returns to zero reliably without a noticable center detent. Pushing the stick towards the back of the synth adds modulation (which is a routable parameter via the control matrix, explained below). It is spring-loaded in both axes. The modulation axis has a lot of travel compared to most other Roland synths I've played.


Patch Selection and Storage

Many Rolands have a set of eight "bank" and eight "patch" buttons, allowing for eight patches to be selected with a single button press, and 64 patches accessible in a maximum of two button presses. However, the V-Synth has far more patch memory than that -- 512 patch locations. Roland came up with a clever way of addressing this. At the patch main screen, on the left side of the screen is a "List" button. Through this, you can access all patches, in numerical order or by category.

However, 64 patches can be assigned as "favorite" patches, accessible from the patch buttons in addition to the on-screen list. The patch buttons are shown below:


Holding down the assign button and pressing one of the 1-8 buttons assigns the current patch to that button in the current bank. (Note that this does not effect patch memory; the patch remains where it was in the on-screen patch list.) To change banks, hold down the bank button and press one of the 1-8 buttons. If you forget what bank you are on, hold down the bank button and the appropriate 1-8 button will flash; also, the screen will display the names of the eight patches assigned to that bank.

Note that all patches, as well as all PCM sounds and samples on board, are stored in a larger overarching structure called a "project". We'll have more to say about this in the next installment.


Keyboard Transpose

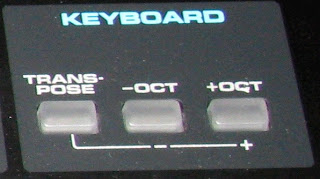
The Keyboard Transpose buttons can transpose the keyboard any desired number of half steps, or quickly transpose by octaves. The latter can be handy when you need to shift the range of the keyboard, say, for a bass or lead patch. These are shown below:


Volume Controls

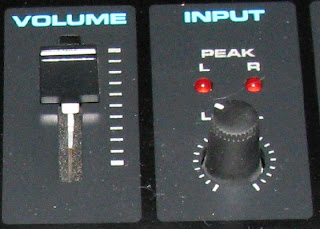
The master volume controls the output levels of all outputs, including the direct outs and the digital outputs. The external input level knob controls the level of any signal coming in through the external inputs; a red LED indicates clipping. (There are also input preamp gain knobs on the rear panel.) These are shown below:


Programmable Knobs

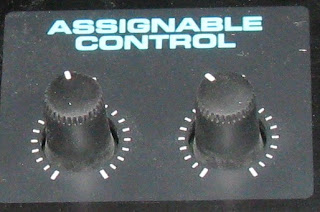
These two knobs can be programmed in the control matrix to provide real-time control over any desired parameter. One thing to note about them is that, unlike the patch editing knobs, the programmable knobs are "live" the moment a patch is selected; if the knobs are not centered, the parameters they control will be effected immediately. Further, these knobs do not edit the patch; they are like MIDI controllers in that respect. (In fact, they are MIDI controllers. They can be set to transmit MIDI CC messages.) The programmable knobs are shown below:


The Cool Toys: Time Trip Pad

Having gone through the undercard, we now come to the main event. What's the first thing that catches the eye of everyone seeing a V-Synth for the first time? Yes, it's the Time Trip Pad! So how does it work? What does it do? And how about that weird slot in the top of the case labeled "D-Beam"?

The Time Trip pad operates in one of two modes: Time Trip mode, and assignable (or "X-Y") mode. In Time Trip mode, the pad operates in a polar, or R-theta mode. You operate it by placing your finger somewhere on the outer circle, and moving it in a clockwise or counterclockwise direction, quickly or slowly (or you can stop). When you do so, you are taking direct control of the time aspect of the Variphrase processing. Recall that Variphrase makes pitch and time independent parameters. When you touch the pad, time freezes. Moving your finger in a clockwise circle causes time to advance, at the speed you move at. A typical example used to demonstrate it is to set up a patch with a basic vocal sample. Touching the pad and moving your finger in a slow clockwise circle causes the vocal sample to proceed as if the person who was sampled was speaking
veeeeeeeeeerrrrrrrrrrrryyyyyyyyyy
sloooooooooooowwwwwwwwllllllllllyyyyyyyy.
Moving your finger in a fast circle causes the vocal sample to be renderedveryfast! The effect is quite different from rocking a tape reel or scratching on a phoograph because the tone of voice of the sample remains normal. If you go very slowly, you can hear individual sibiliants, clicks, thumps, and transient vowel sounds and vocalizations that we don't normally consciously hear in speech. The effect is quite weird. Moving your finger in a counterclockwise circle causes time to go backwards, so in the case of our vocal sample, it will sound like a reversed tape. Here is the Time Trip pad and its mode buttons:
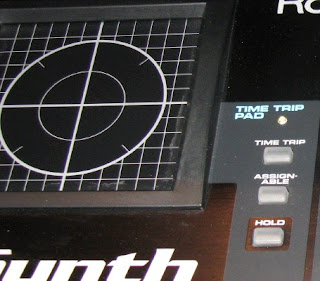


When you take your finger off the pad, time reverts to advancing normally, unless you have engaged the "Hold" switch to the right of the pad. In this case, the pad retains the last position touched until you touch it again, meaning that time will "freeze" when you take your finger off the pad.

In the Time Trip mode, an additional parameter of your choice can be controlled by how far away your finger is from the center of the pad. This is set up in the control matrix (discussed further down).

When Assignable mode (often referred to as "X-Y" mode in the patch editing screens) is selected, the pad controls two parameters of your choice. One parameter is effected by vertical movement of your finger, the other by horizontal movement. You select which two parameters you want to control in the control matrix. The zero position of the pad is determined by how you set up the parameters in the matrix; normally, this will be the center of the pad, but you can set it up differently if you want. Whenever you take your finger off the pad, the parameters being controlled will revert to zero unless the Hold button is on; in this case, the pad will remember the last position touched until it is touched again.

In either mode, the blue light next to the pad will light whenver the pad is controlling something, either because it senses a touch, or because Hold is on.

Here is a demonstration of the Time Trip pad being used on a vocal sample. The patch has the vocal sample on OSC 1; OSC 2 is off. COSM 1 has a comb fiter selected; COSM 2 is off. The R parameter of the Time Trip pad is controlling the center frequency of COSM 1; you can hear this when I move my finger closer to the center of the pad. At about 1:40, I engage the hold switch. The squealing noise heard in places is an artifact of the low-quality sample.


D-Beam

The D-Beam is an infrared range sensor; it senses how close your hand (or any other object over the panel) is to the sensor. The distance is translated into a value for a control parameter. The sensors are buried in a slot in the panel, with big blue LEDs on either side of it. Depending on the calibration, the D-Beam will trigger whenever an object is 18-24 inches (45-60 cm) above the slot. Note that this may be a problem if you set up the V-Synth on a multi-keyboard stand with another keyboard above it; the D-Beam will sense the bottom of the keyboard above. (I'm having this problem right now; my D-Beam is picking up the bottom of the Juno-106 on the tier above. And I've got that tier as high up as it will go on the stand. I don't want to put the V-Synth on top because the touch screen will be hard to read if it's up too high.) The manual mentions that the useable range may be reduced if the sensor is exposed to direct sunlight. I haven't tried that; I do have the V right in front of a window, and light coming in has not caused a problem. The D-Beam and its mode buttons are pictured below:


Many players who have played with a V-Synth in the store may not realize, and it isn't well explained in the manual, that there are actually two sensors in that little slot. The beams are pretty close together, so just moving your hand randomly over the slot is likely to activate both of them. You have to stay over to the side to only activate one sensor. You can tell when you are doing it right because only the blue LED on that side will light. Operating both sensors independently, with one hand, is a bit of a feat. I've had some success with holding my hand with my index and pinky fingers extended, while the middle and ring fingers are curled in (the "devil's horns" hand sign) and rotating my wrist this way and that to change the relative distances of the two fingers above the sensors.

The D-Beam has four operating modes, which I'm going to address out of order for clarity. The Pitch mode make the D-Beam a pitch bend control. Being that it's a unidirectional sensor, it can only bend in one direction, either up or down depending on how you set it up in the patch. However, if your patch is using PCM oscillators with stereo samples, the two sensors will bend the left and right channels independently, which is pretty cool. The second mode is Time, which instead of pitch bending performs time bending. As you move closer to the sensor, time slows down, while pitch is maintained thanks to Variphrase. Again, if you are using stereo PCM waveforms, the two sensors will operate on the left and right channels independently.

The Assignable mode sets up the two sensors to control two parameters of your choice, per your selections in the control matrix. The Time Trip mode, like the Time Trip pad, is motion rather than position sensitive. To make time advance, you move your hand towards and then away from the sensor cyclically. This is kind of difficult; there is a "turning point" at each end of the travel that you have to reach. If you don't, then when you reverse direction, time will go backwards. I'm not sure how useful this is, considering that the Time Trip pad provides the same effect and is easier to control. Unlike the pad, the D-Beam does not have a hold function.


Arpeggiator

An old favorite that went away a long time ago returns: the arpeggiator. Analolg old-timers will recall that the old Jupiters and Junos (up to the Juno-60) offered an arpeggiator that allowed the performer to hold a chord on the keyboard and the synth would play an arpeggiation of the notes held. The effect was commonly used in the late '70s and early '80s; among other things, it provided a way to simulate the analog step sequencers found on the large modular systems of the day. Here are the arpeggiator panel controls:


Well, this isn't your Juno-60's arpeggiator. The simple front panel controls disguise just how sophisicated the V's arpeggiator is. The on/off button is obvious; it enables or disables the arpeggiator. The knob controls the rate. The hold button causes the arpeggiator to "lock on" to any note struck, even after the note is released. What this is good for will be explained momentarily.

The real capabilities of the arpeggiator are in the patch settings, accessible through the touch screen. The arpeggiation can run a number of different patterns, or "motifs": ascending, descending, alternating, random. It can also arpeggiate the notes in the order that you struck the keys. These do pretty much what you expect. However, you can also build your own patterns, and it's here where some of the power becomes evident. In a user pattern, all notes in the pattern need not have the same time value. Duration as a percentage of the note value can be controlled, and tied/slurred notes can be set up. Rests can also be inserted. Two special motifs that can be used with a user pattern are the fixed motif, in which the pattern actually specifies a fixed sequence of notes (used with drum kit patches), and a motif in which a held key specifies what key the pattern plays in. You can also limit the range of the keyboard over which the arpeggiator operates. This is where the arpeggiator hold button becomes useful: you can play an arpeggiation, hold it, and then play a lead or some other part on the part of the keyboard that is excluded from the arpeggiator, while the arpeggiation continues to run. The default rate is a patch parameter, or you can set it up to sync the arpeggiation to received MIDI Clock messages.


V-Link

The V-Link provides the ability to control an Edirol video pattern generator and display system by what is played on the synth. The intent is to provide synchronized audio and video performances, a concept that flashes back to the late '60s when concerts were frequently accompanied by visuals from slide or film projectors creating abstract patterns. I don't have one of the Edirol video generators, so I can't say much else about V-Link. I will note that, from reading the description in the manual, it appears to take over the MIDI Out port when it is on.


The Missing Button: Portamento

The V has a good portamento capability. All portamento parameters are stored with the patch. Constant-time and constant-rate modes are available; up and down times are independently settable, and a legato mode is available which activates the portamento only when playing legato. So what's missing? There is no button on the panel to turn portamento on and off. I think this is the first synth I've ever seen which had portamento but no panel control for it. To turn it on or off, you have to go into the patch parameters.

Using Your Feet

The V has a hold pedal input and not one but two expression pedal inputs. The hold jack can be set up for either a normally-closed pedal (Roland's standard) or a normally-open pedal (nearly everyone else's standard) in the system settings.


The Control Matrix

All of the V-Synth's real-time controllers -- keyboard aftertouch & velocity, the modulation axis of the bend lever, the assignable knobs, the R dimension of the Time Trip pad, the X and Y dimensions in the X-Y mode of the pad, and the assignable mode of the D-Beam -- are routed to parameters via the control matrix. The matrix has eight source slots, each of which has two destination slots. To set up a routing, you pick an empty source slot and choose a source. Then, you can choose one or two destinations and set the sensitivity of each. There are about 75 possible destinations, so I won't list them here; download the manual from Roland if you're interested. The sensitivity effects how much the controller effects the destination parameter, in either direction; it can be set positive or negative.

In order to record MIDI from the real-time controllers (other than aftertouch and velocity), each controller is assigned to a MIDI Continuous Controller number in the system mode settings. Although it is possible to select a MIDI CC number directly as a source in the control matrix, it will probably be less confusing to use the CC numbers assigned to the controllers. This will be covered in Part 5.


Until Next Time

The next installement, Part 5, will cover all aspects of the V-Synth's audio and MIDI I/O. There are aspects of how the controllers, the arpeggiator, and MIDI interact that aren't well explained in the manual. I'll be doing some research and experimenting on these. Also covered in Part 5 will be the V's USB interface, which is quite powerful but requires some care in setup and use. I'll go through how the V structures its internal storage and show you how to use the USB without fouling up the operating system.

Friday, June 13, 2008

TOSLink

The next post in the V-Synth series is coming tomorrow.  As soon as I find a mic that works so I can make a demo sample.  In the meantime, here's another aspect: The synth, like a lot of modern ones, has digital I/O.  This comes in the form of both standard S/PDIF coax connectors, and TOSLink optical connectors.  Since my MOTU 828 Mk I audio interface also has digital I/O, I decided that I wanted to be able to run the V-synth straight into it, so that I don't always have to allocate two channels for the V on the mixer.  

Just for the heck of it, I decided to go with TOSLink (which is basically the S/PDIF protocol on fiber) instead of the coax.  I've never had a chance to play with TOSLink before.  So I bought an optical cable and hooked it up.  And once it dawned on me that the synth and the 828 can't sync if they're both on internal clock (duh), it worked fine.  It's kind of cool to have a laser in your synth:


Here's a less artistic but clearer shot of the cable connector.  


That little metal tip contains the fiber end.  It looks round in the photo, but if you were to look at it closely it's actually D-shaped.  The socket it goes into is also D-shaped, so it has to be rotated the right way in order to plug in.  


Monday, June 9, 2008

Inside the V-Synth, part 3

In this installment of Inside the V-Synth, we'll look at the V's onboard effects. The effects are divided into three blocks: multi-effects (abbreviated MFX on the panel and in the manual), chorus (which also includes some fixed delays), and reverb. Each of these blocks has a dedicated on-off button on the panel. All effects parameters are stored as part of the patch. One effect can be selected for each block at a given time.  The figure below illustrates how signals are routed to the three blocks:


All three of the effects blocks has a send that comes from the mix of all of the VCAs for each voice. (Any patch whose output is routed to the direct outs bypasses all effects, as in the case of the JD-800 and many other earlier Roland synths.) In addition, the MFX can send its output to the chorus and reverb inputs, and the chorus can send its output to the reverb input. It would have been nice if some alternate routings had been provided, but this routing works for most applications. Note that the signal path here (as in everywhere else in the synth) is stereo all the way through, but there are some MFX effects that will mix their inputs down to mono to run through the effect.  So the routing is straightforward, with only a few choices. But the MFX has lots of choices! To wit:

Multi-Effects Types

Filters and Equalizers: This category provides a 4-band parametric equalizer; with two sweepable and Q-variable mid-bands. (Note that there is also a 3-band parametric equalizer which effects all patches; its settings are stored as part of the system settings. To avoid confusion, I recommend keeping the system EQ set flat for most purposes.) There is a 2/3-octave graphic equalizer, which however for some reason only goes down to 180 Hz, which limits its usefulness. Also available are a resonant filter with its own LFO, an auto wah which can be driven by an LFO and/or an envelope follower applied to the input, and something called the "isolator and filter". This is an interesting chain of filters: it begins with a 3-band EQ that works like the tone controls on some guitar amps: the three bands cut severely when turned all the way to the left, and they overlap such that if you turn all three of them all the way down, it completely kills the output. Next are a low-band and mid-band "antiphase". When these are on, they put a bandpass tap on each of the stereo channels, invert the output, and then add the result back to the opposite channel. With center-panned mono signals, this just causes cancellation, but with mono signals that are panned to one side, or stereo signals (from a patch using a stereo PCM sample, or a stereo external input), the results range from weird phasing effects to stereo field expansion, depending on the nature of the input. This is followed by another filter, which can select 2-pole or 4-pole response, lowpass/highpass/bandpass/notch curve, and variable resonance. The chain ends with a bass cut/boost filter.

The final, and unusual, filter effect is the "humanizer". This is basically an envelope filter, following the amplitude of the input signal, but in place of a conventional filter it uses a formant filter tuned to various vowel sounds. As the signal level increases or decreases, the formant moves from one vowel to another, with the two endpoints settable. There is also an LFO to drive the formants, an overdrive effect preceding the format (which can make the effect more intense), and a 2-band EQ following.

Distortion effects and guitar amp simulators: There are two effects, an overdrive/distortion effect, and an amp simulator effect. Both are expanded versions of algorithms that are also available in the COSM filters. The former provides two distortion modes, four speaker cabinet simulations (ranging from a small practice amp to a double speaker cab), an option to mix the input down to mono prior to applying the distortion, and a 2-band EQ on the output.

The guitar amp simulator provides an extensive selection of options. The effect chain begins with a noise gate, with variable threshold. (Why, one might ask, does one need a noise gate inside a synth? Well, you might be using a real genuine guitar plugged into the external input. And it might be picking up real genuine AC hum...) There's an interesting selection of amp models with interesting names, like MS1959I... When you select the parameter, there's a little icon of the amp that gives the game away. Roland obviously didn't have permission to use other manufacturers' names, but the little icon for the above makes it clear that it's supposed to be a Marshall. There are others which I'm pretty sure are supposed to be a Vox, a Matchless, a Mesa Boogie, and a couple that I didn't recognize. Plus, there's the one amp whose name they could use, the Roland Jazz Chorus-120 (unfortunately, its wonderful built-in chorus effect isn't included in the model), and several Boss distortion stomp box models. There's a selection of tone controls typical of what you would find on a guitar amp, followed by a speaker sim with choice of 13 cabinet types, and (it's almost getting silly) a mic model with a parameter to vary how far the imaginary mic is from the imaginary cabinet! You can also mix the mic and direct sound.

Delays: The MFX provides an extensive selection of delays (don't forget that there are also a few available in the chorus). The most straightforward are the stereo delay and the multi-tap delay. The stereo delay is a straight-up digtal delay, with up to 650 ms of delay time, or 1300 if you put it in mono. (You can also sync it to the synth's clock source, by selecting a note value.) In stereo, it acts as two separate channels; there is also an "alternate" mode which cross-straps the feedback from one channel to the other channel. Low and high frequency damping is available in the feedback loops, plus a 2-band EQ on the output. The feedback can go very high in either the inverting or non-inverting direction; I have been almost been able to push it into runaway, but not quite. (You can hear it starting to slap, but then it fades out. I'm guessing there is an anti-runaway provision in the code that applies damping when internal overflows start to occur.) The multi-tap delay provides five mono taps (it mixes its input down to mono). Each tap can go to 1300 ms, or be synced to clock, and can be panned L-R in the output. Feedback is from the output of the combined taps back to the mono input.

The reverse delay tries to create a reverse-echo effect. It works well on short percussive sounds, and on continuous sounds. Sounds that vary a lot, like vocals, get it confused and cause pops in the output. The band pass delay is like the multi-tap delay, except that it has a phaser effect preceding the delay line, and each tap has its own bandpass filter on the input.. The tape echo simulator does a pretty good impression of a Roland Space Echo, down to the tape saturation, and wow and flutter as might be caused by a lopsided capstan. The "vocal echo" is supposed to simulate the slapback reverb from a karaoke machine; it's basically a mono delay with a lowpass filter on its input.

Choruses and Flangers: This rather large category starts with a basic digital stereo chorus/flanger, with pre and post EQ and a pre-delay. The "hexa chorus" is a six-stage chorus whose outputs can be spread across the stereo field to produce pseudo-stereo effects (it mixes its input to mono). The "space chorus" is a re-creation of the famous Dimension D spatial effect. Since I've not had access to a real Dimension D, I can't say for sure how accurate it is, but it does seem to re-create the descriptions I've heard of it. There's also a re-creation of the Boss CE-1 Chorus Ensemble stomp box, which is actually the closest of all of the chorus algorithms to what we think of as the classic Roland chorus effect. Flanger algorithms include a simulation of the SBF-325 bucket-brigade based analog flanger, an algorithm that simulates several of the Boss stomp box flangers, and an odd "step flanger" whicn advances the effect in a stair-step pattern and can be synced to the V's tempo clock.

Phasers, Rotaries, and Trems: Two phaser algorithms are provided, one that simulates an analog phase shifting circuit, and one that is purely a digital implementation. There's a rotary speaker emulation (which behaves rather bizarrely if you attack it with the Time Trip pad), and tremolo/auto pan effect.

Lo-Fi: This rather strange category includes a bit crusher, which can both reduce bit depth of samples and down-sample to lower sample rates. It also includes algorithms that simulate the distortions and frequency losses characteristic of AM radio transmission and phonograph. The latter goes to some considerable trouble to provide all conceivable means to mess up your sound, including simulations of the three most common types of phonograph disc, surface noise, and wow/flutter (pitch irregularities that occur due to a record being warped and/or out of round, or due to worn or poorly made parts in the turntable drive).

Other Single Effects: The stereo pitch shifter can shift to +/- one octave, with a pre-delay and post EQ. It provides five choices of "fineness"; higher values produce less distortion but at the cost of additional inherent delay. (Unlike the COSM filter effect, this is a true pitch shifter, not a frequency shifter.) The "pseudo stereo" effect creates a simulated stereo field from a mono source.

Effects Chains: There are a number of selections that combine several types of effects in series. The dynamic processor effect combines a compressor/limiter, a spectrum enhancer (which adds second-harmonic content, somewhat like an Aphex box), an EQ, and a noise gate. This one is stereo all the way through; the "Vocal Multi" is similar except that it mixes its input to mono, and it replaces the noise gate with a delay. "Guitar Multi", which also mixes its input to mono, provides compression, distortion, chorusing, and delay in sequence. "Bass Multi" (mixes input to mono) provides compressor, distortion, EQ, and chorusing. "Electric Piano Multi", which appears to be designed mainly to be used with Rhodes pianos or similar sounds, provides spectrum enhancement, phaser, chorus, and tremolo/pan. This one is peculiar in that the spectrum enhancer and trem/pan are stereo, but the phaser and chorus mix their inputs to mono (bypass remains stereo) and provide stereo output. "Keyboard Multi" provides ring modulation (against an oscillator which is internal to the algorithm), EQ, pitch shifter, phaser, and delay. The latter three effects are mono with outputs pannable across the stereo field; the bypass remains stereo. Finally, there are chain effects that combine various combinations of distortion, chorus, delay, phaser, and spectrum enhancement.

Chorus and Reverb Types

Whew... the chorus and reverb blocks are simpler. There are five chorus algorithms, all but "Feedback Chorus" of which are fairly standard. "Feedback Chorus" is kind of weird; I'm not sure how to describe it. It's sort of like a phaser with, say, 16 or 24 stages. Or, you can choose a flanger or two short delays. The reverb block provides three hall reverbs (Hall 1 includes a chorus effect), three rooms, a plate reverb simulation, "garage", and "non-linear". The halls and Room 1 all sound kind of metallic to me; maybe I haven't spent enough time playing with the EQ parameters. The plate reverb is very decent, if you like the plate sound in general (I'm not a big fan of it). "Garage" pretty much sounds like what you think it sounds like. "Non-linear" is interesting; as best I can figure, it applies an arbitrary four-segment envelope (totally user configurable) to each sample of the reverberated sound. Some of the things it can do almost come out sounding like granular synthesis. If you want to render a perfectly good sound utterly unrecognizable, this is the algorithm to use.

Summary

The modeling capabilities of the MFX block go considerably beyond the standard built-in effects found on most synths.  The chorus and reverb blocks are useable, although for studio use an outboard reverb with more algorithms and more flexibility might be preferred.  The V's synth architecture provides a set of dedicated DSPs for effects processing (unlike all of the voice processing, which uses a shared pool of DSPs), so switching effects in or out has no impact on available polyphony.  One thing that's a nuisance for multi-timbral sequencing (via an external sequencer) is that all parts are routed through the same effects; the effects settings are determined by the patch selected in part 1.  The way around that is to direct the other parts to the direct outs (which bypasses the effects), but that's a setting that has to be made in the patch.  

In Part 4, we'll look at the V-Synth's innovative selection of performance controls.


Sunday, June 1, 2008

Inside the V-Synth, part 2

In Part 1 of this series, we looked at the oscillator types and functions of the V-Synth. Now, let's look at the rest of the voice signal chain.

Structures

Recall that the V allows, for a given patch, a choice of one of three "structures", which determines which order the processing elements are placed in. This concept is a carryover from earlier Roland digital synths; given the limitations of the technology used in those synths, it was necessary to use structures in order for the synth to determine the DSP resources needed for a given patch, and to provide for certain cross-element modulation functions such as ring modulation. However, the V is smart enough to allocate DSP resources dynamically, and it provides other means of modulation. So the only thing the structure selection on the V really does is determine where the COSM filters are placed in the chain; everything else is the same in all three structures. Structure 1 places both of the filters in series after the oscillator modulation mixer. Structure 2 places COSM 1 in line after osc 1, ahead of the filter. Structure 3 places both COSM filters ahead of the mixer, one each in line with each of the two oscillators.  The diagram below illustrates them in the same configuration as the structure selection buttons on the panel (for some reason, I haven't been able to take a good picture of the actual buttons):


The Oscillator Modulation Mixer

The oscillator modulation mixer (usually referred to as the "mod" for short) combines the outputs of the two oscillators (one or both of which may have been processed by a COSM filter at this point, depending on the chosen structure). The mod takes care of all forms of modulation (except cross-modulation) in which one oscillator effects the other. The mod operates in one of four modes:

  1. Add mode. This simply mixes the two signals.
  2. Ring modulation mode. This allows osc 2 to amplitude-modulate osc 1 in any amount up to full balanced, or ring, modulation. (Recall that ring modulation is simply AM at 100% modulation.)
  3. FM mode. This mode allows osc 2 to frequency-modulate osc 1. In Yamaha terms, this is only 2-op FM, so it may sound lame. However, recall that the canonical Yamaha FM system uses only sine waves, while the V allows any waveform to be used as either the carrier or the modulation. So very complex and bizarre results are easily (a bit too easily!) obtainable.
  4. Oscillator sync mode. In this mode, osc 1 will sync to osc 2. Osc 2 must be a virtual analog waveform.

The COSM Filters

The "COSM" acronym is a Roland trademark which stands for Composite Object Sound Modeling. Basically, it's a set of software algorithms that implement all of the familiar analog filter types (high pass, low pass, bandpass, and notch), as well as a number of more complex types, physically modeled resonators and some other algorithms that either aren't actually filters or do things other than just filtering (such as compressors and guitar amp simulators). The complete list:

  1. TVF -- "time-variant filter", a long-standing Roland-ism for the digital equivalent of your basic VCF. Lowpass, bandpass, highpass, notch, and "peak" (which I presume is a high-Q bandpass) are available, and you can select 1-, 2-, or 4-pole response.
  2. Dynamic TVF, a filter whose cutoff frequency tracks the envelope of the input signal. Same options as above.
  3. Dual filter. This allows you to put a lowpass and a highpass in series or in parallel, or put two bandpass filters in parallel.
  4. TB Filter, which simulates the VCF of the famous/notorious TB-303 bass machine.
  5. Sideband filter. This is basically a lowpass and a highpass arranged in a "back to back" configuration so that they create two passbands about a center notch. Useful for adding a sense of pitch to unpitched noises, and for picking out certain harmonic bands from an FM-generated signal. There are two of these, a first-order filter and a second-order filter.
  6. A comb filter. This is the type of filtering produced by flangers.  It can also be used to creat formants.
  7. A resonance simulation. This simulates the resonance of a hollow-bodied guitar. It can also simulate a banjo or resonator guitar (e.g., a Dobro) body.
  8. Amp and speaker simulations.
  9. Distortion and overdrive.
  10. A wave shaper, which can alter and distort wave shapes in various ways.
  11. A "lo-fi processor", which is actually a bit crusher (reduces the resolution of the samples), and downsampler (interpolates the samples down to a lower sampling rate).
  12. A compressor and a limiter. These are interesting because they are actually part of the voice; like the other filter algorithms, they process each note separately. These can be very useful problem solvers. A typical problem when setting up patches with drastic filter settings is that some notes play much louder than others. If COSM 1 is used as a drastic filter in a patch, setting up COSM 2 as a compressor or limiter will smooth out the variations in loudness between different notes.
  13. A frequency shifter. This duplicates an effect that was originally developed in analog form in the 1950s, but was seldom used because the necessary circuitry was expensive and difficult to keep in calibration. Unlike the more common pitch shifter, the frequency shifter does not maintain the harmonic relationships between overtones. Needless to say, it can produce some very strange effects.

Each COSM algorithm has its own set of tweakable parameters, which are denoted in the detailed descriptions in the manual as parameters #1 through #4 (or fewer if the filter type doesn't have that many). The parameters labeled #1 and #2 are always controllable via the "cutoff" and "resonance" knobs on the panel respectively. Generally, these will be, if not actually cutoff and resonance, something analagous. However, in the case of things like the distortion and overdrive types, it's not always obvious; you have to read the manual. All four of the numbered parameters can also be assigned to the control matrix, which means they can be controlled using any of the synth's performance controls and/or MIDI Continuous Controller messages; this will all be described in a future installment. As in the case of the oscillators, each COSM has its own LFO which can be assigned to almost any parameter, and most paramters have their own envelope generators.

The final voice component in the chain (in all three structures) is the TVA. This has its own envelope generator, which has sliders on the panel (of the dozens of envelope generators in the voice architecture, it's the only one that does). It's somewhat surprising that the envelope is a conventional ADSR, given that the JD-800 and some of the JX series synths had more sophisticated multi-segment envelopes. The TVA does have, like everything else, its own LFO.

In the next installment, we'll look at the V-Synth's onboard effects.